Google SAML Setup Guide
Introduction
This guide will take you through the steps to setup Google Workspace as a single sign on Identity Provider for OptiTune.
Start adding the SAML Configuration
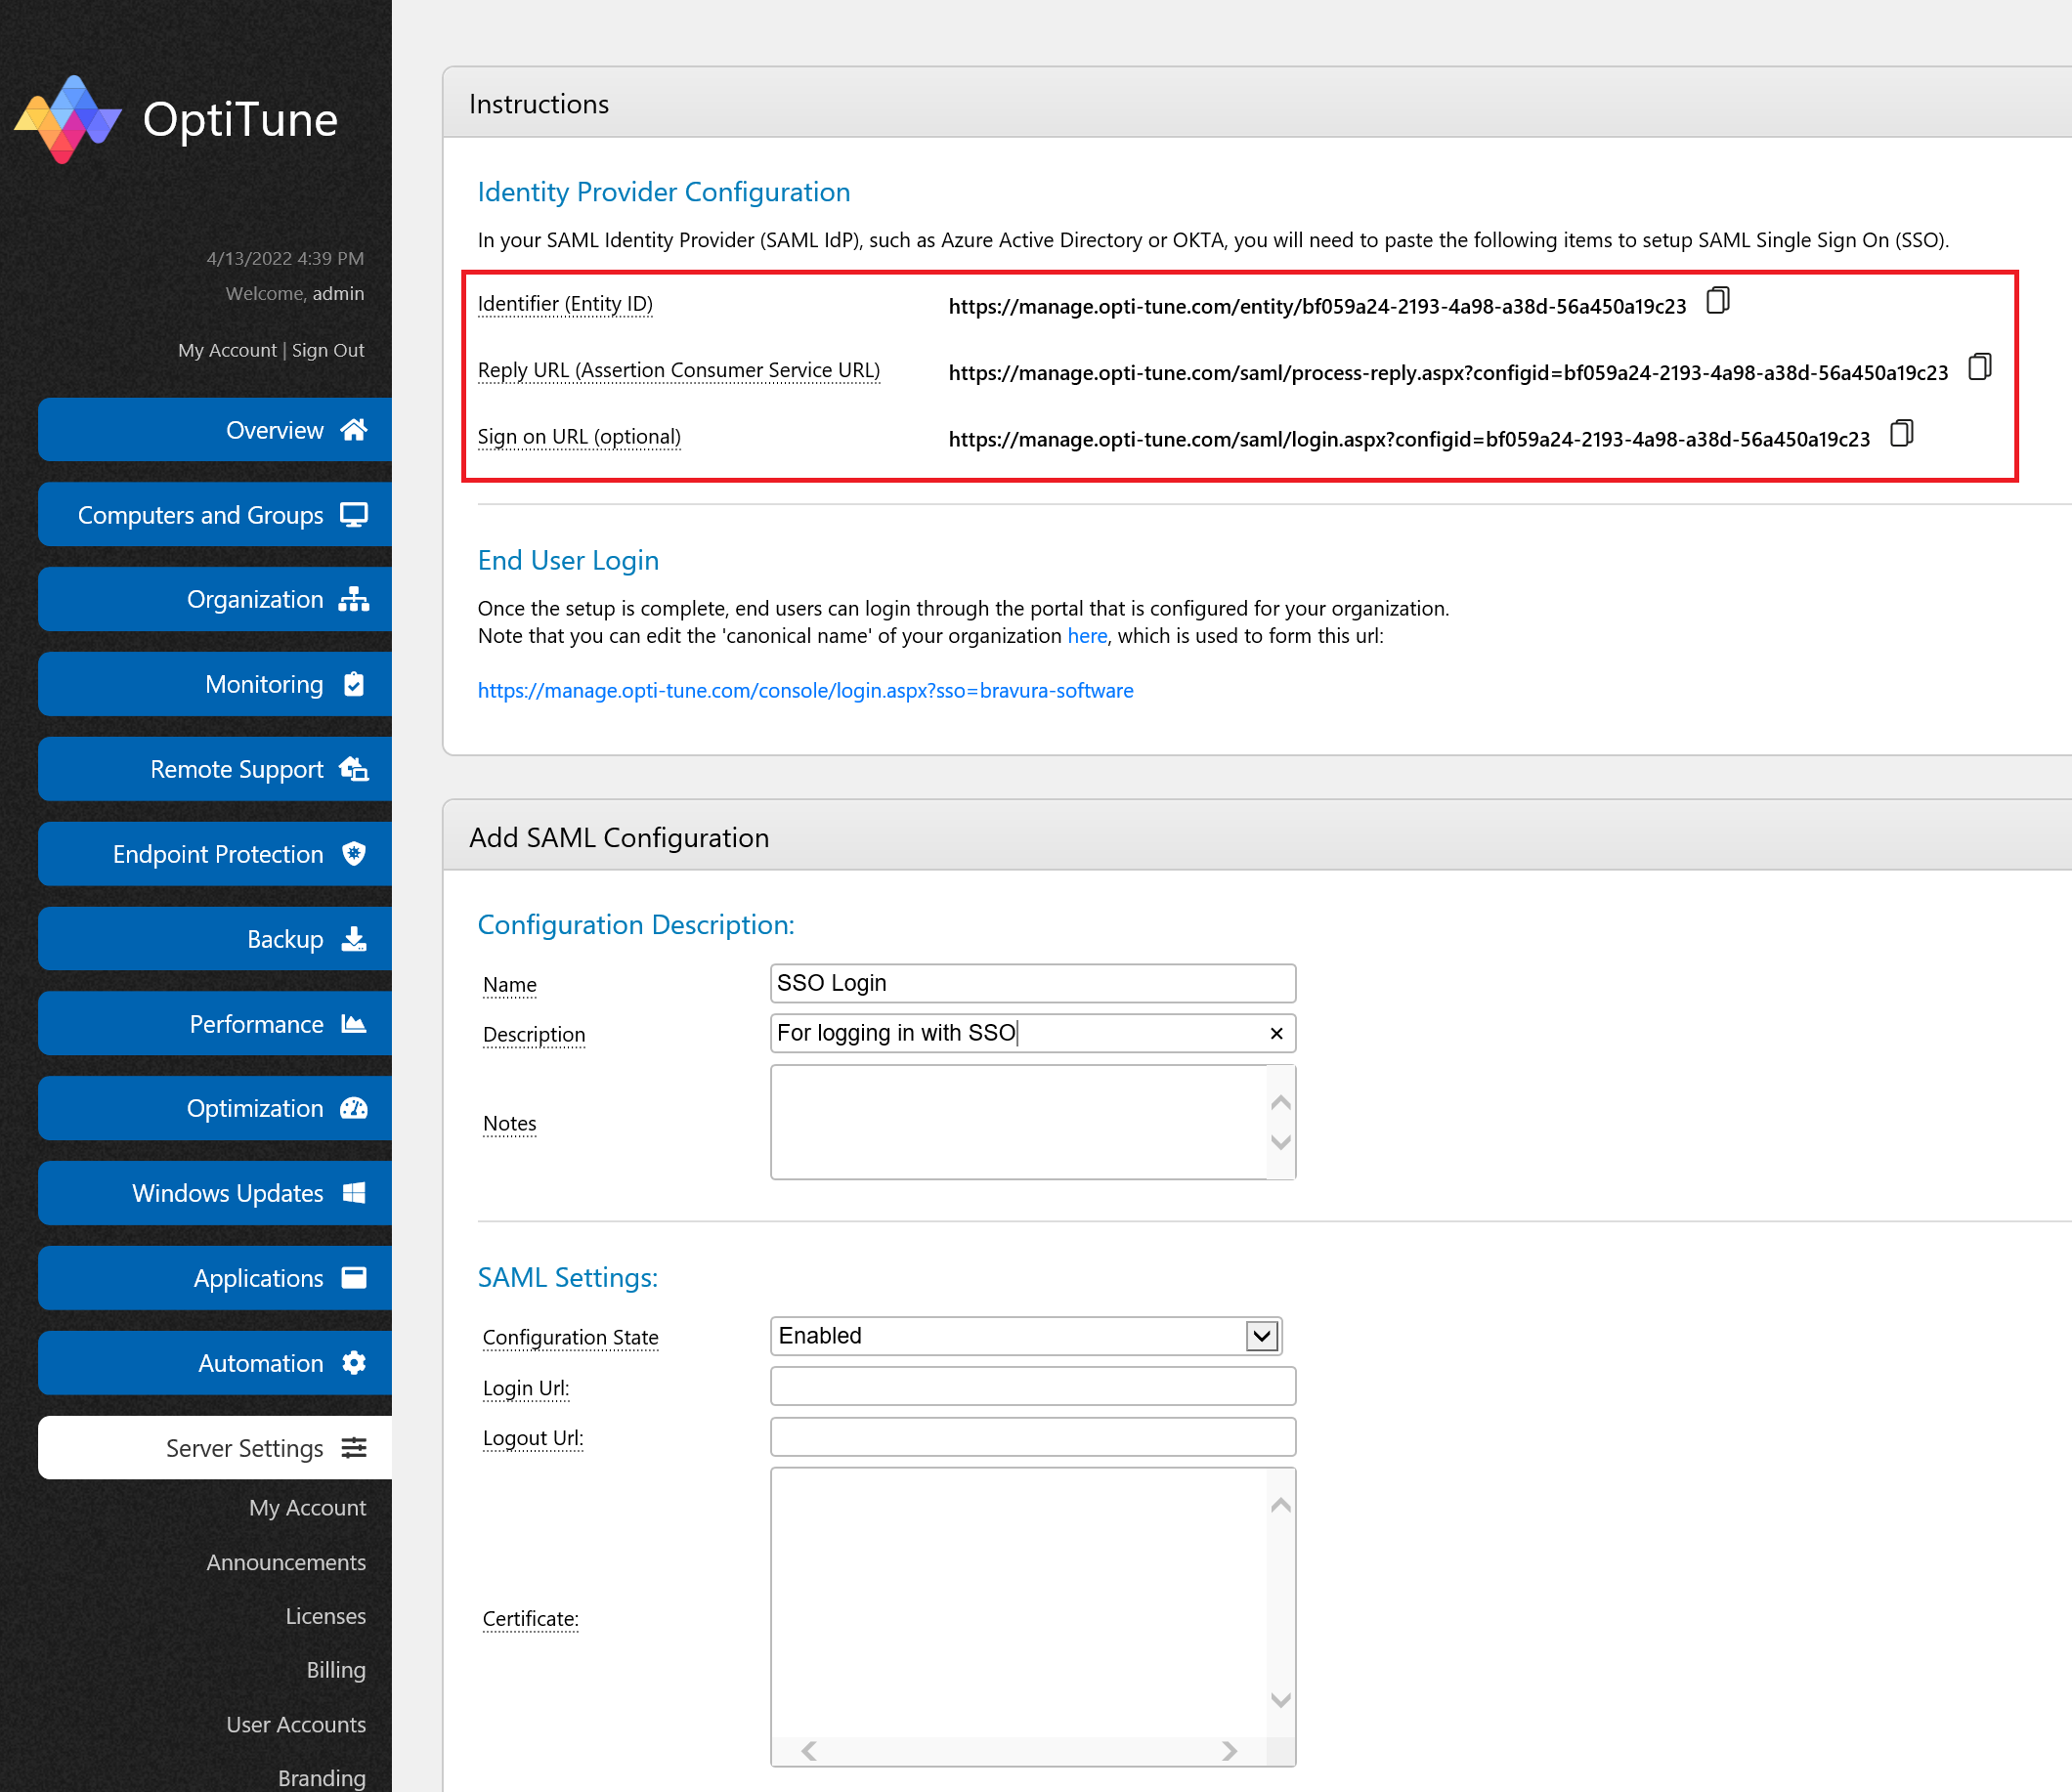
In the OptiTune management console, go to the SAML Configurations page, and click "Add".
Enter in a name and description for the SAML Configuration, as shown below.
You will need to copy the information shown under "Identity Provider Configuration" for the next steps.
Create the web application in Google Workspace
Login to Google Workspace Admin Console
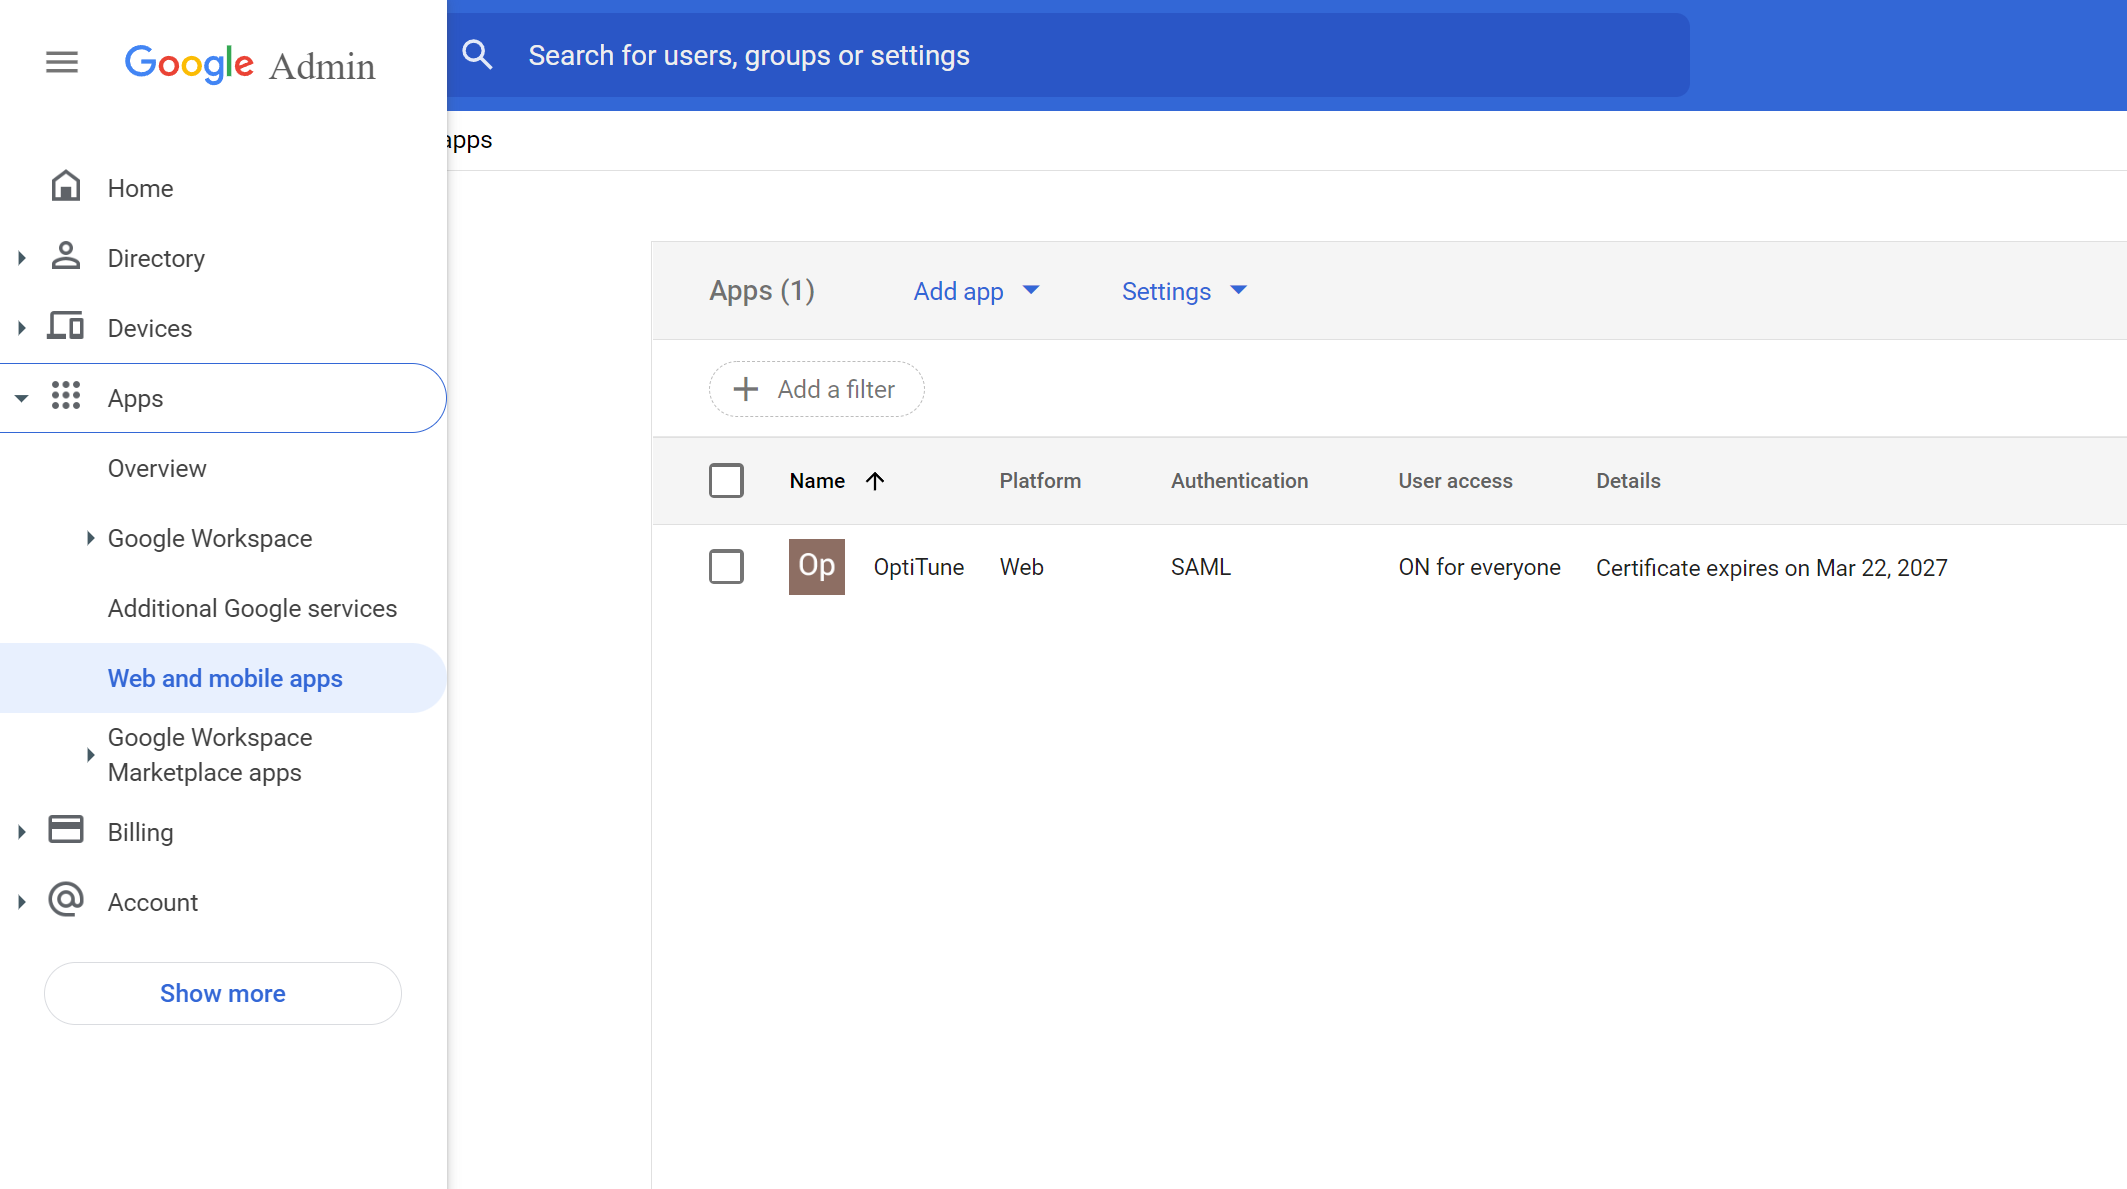
Login to https://admin.google.com and select "Apps" > "Web and mobile apps"
Add custom SAML app
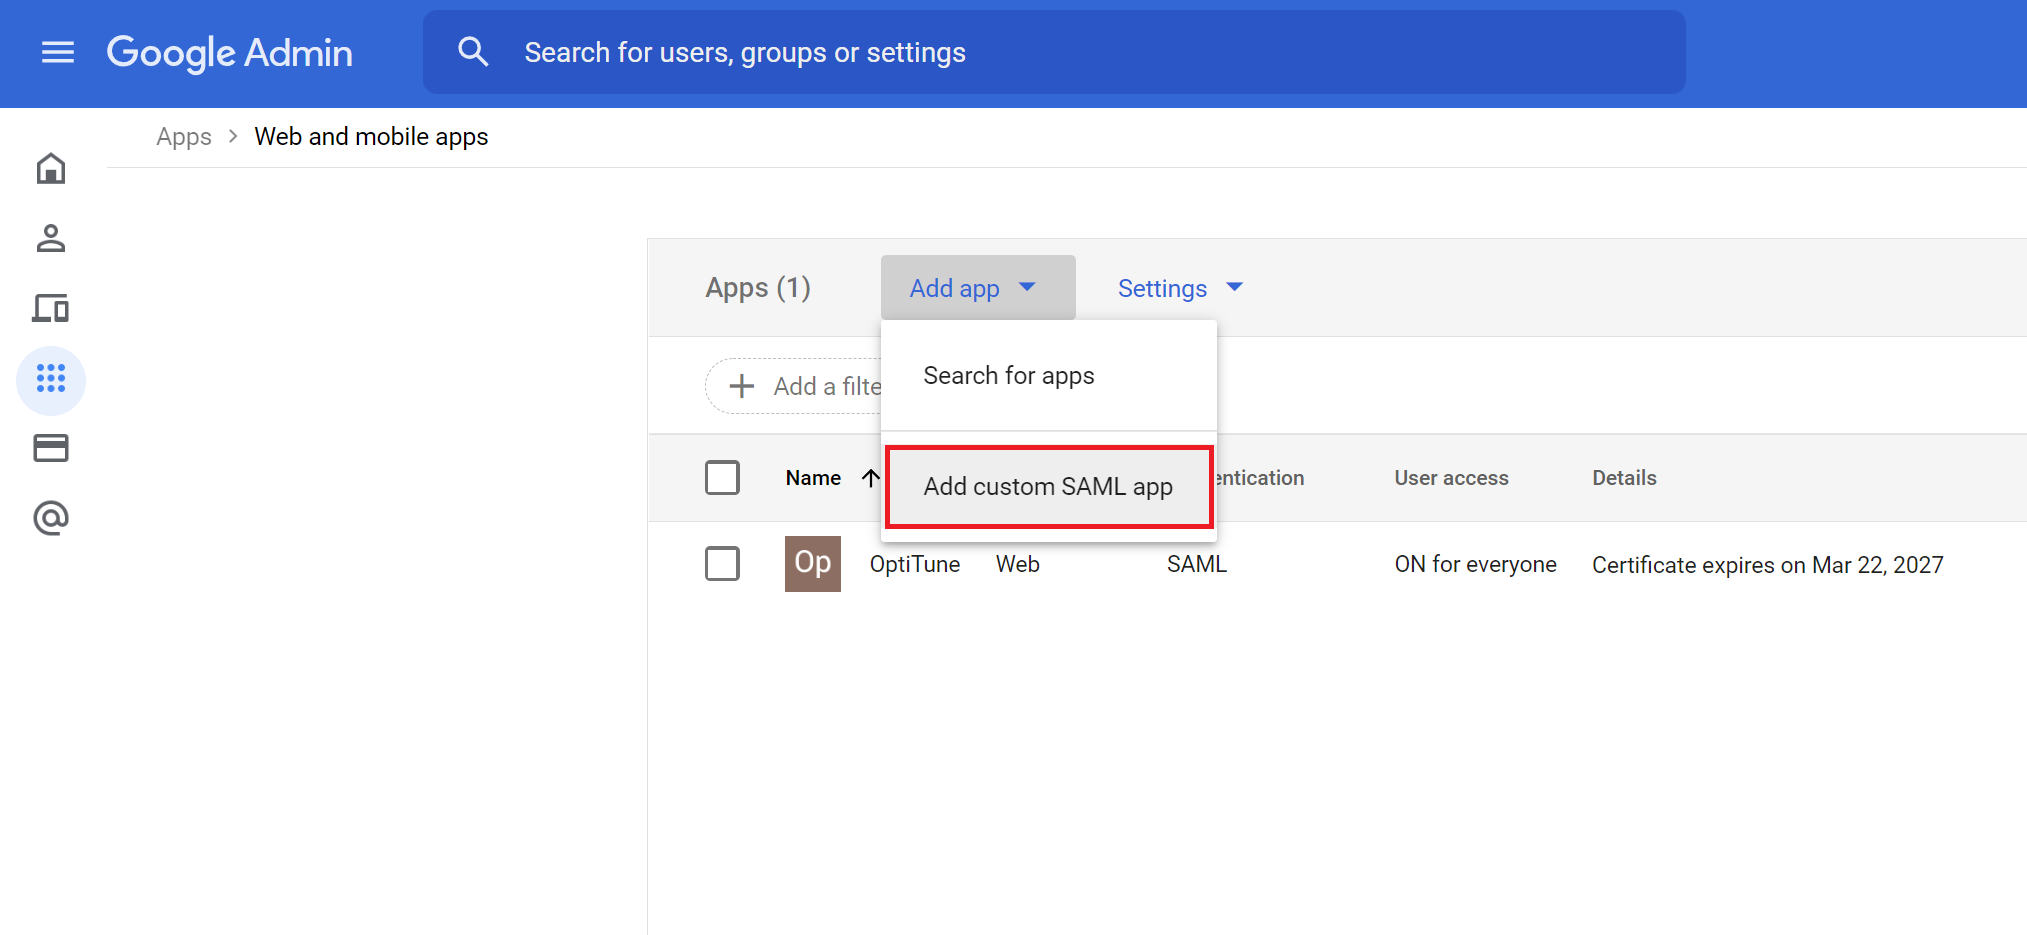
Select "Add App" > "Add custom SAML app"
Enter app details
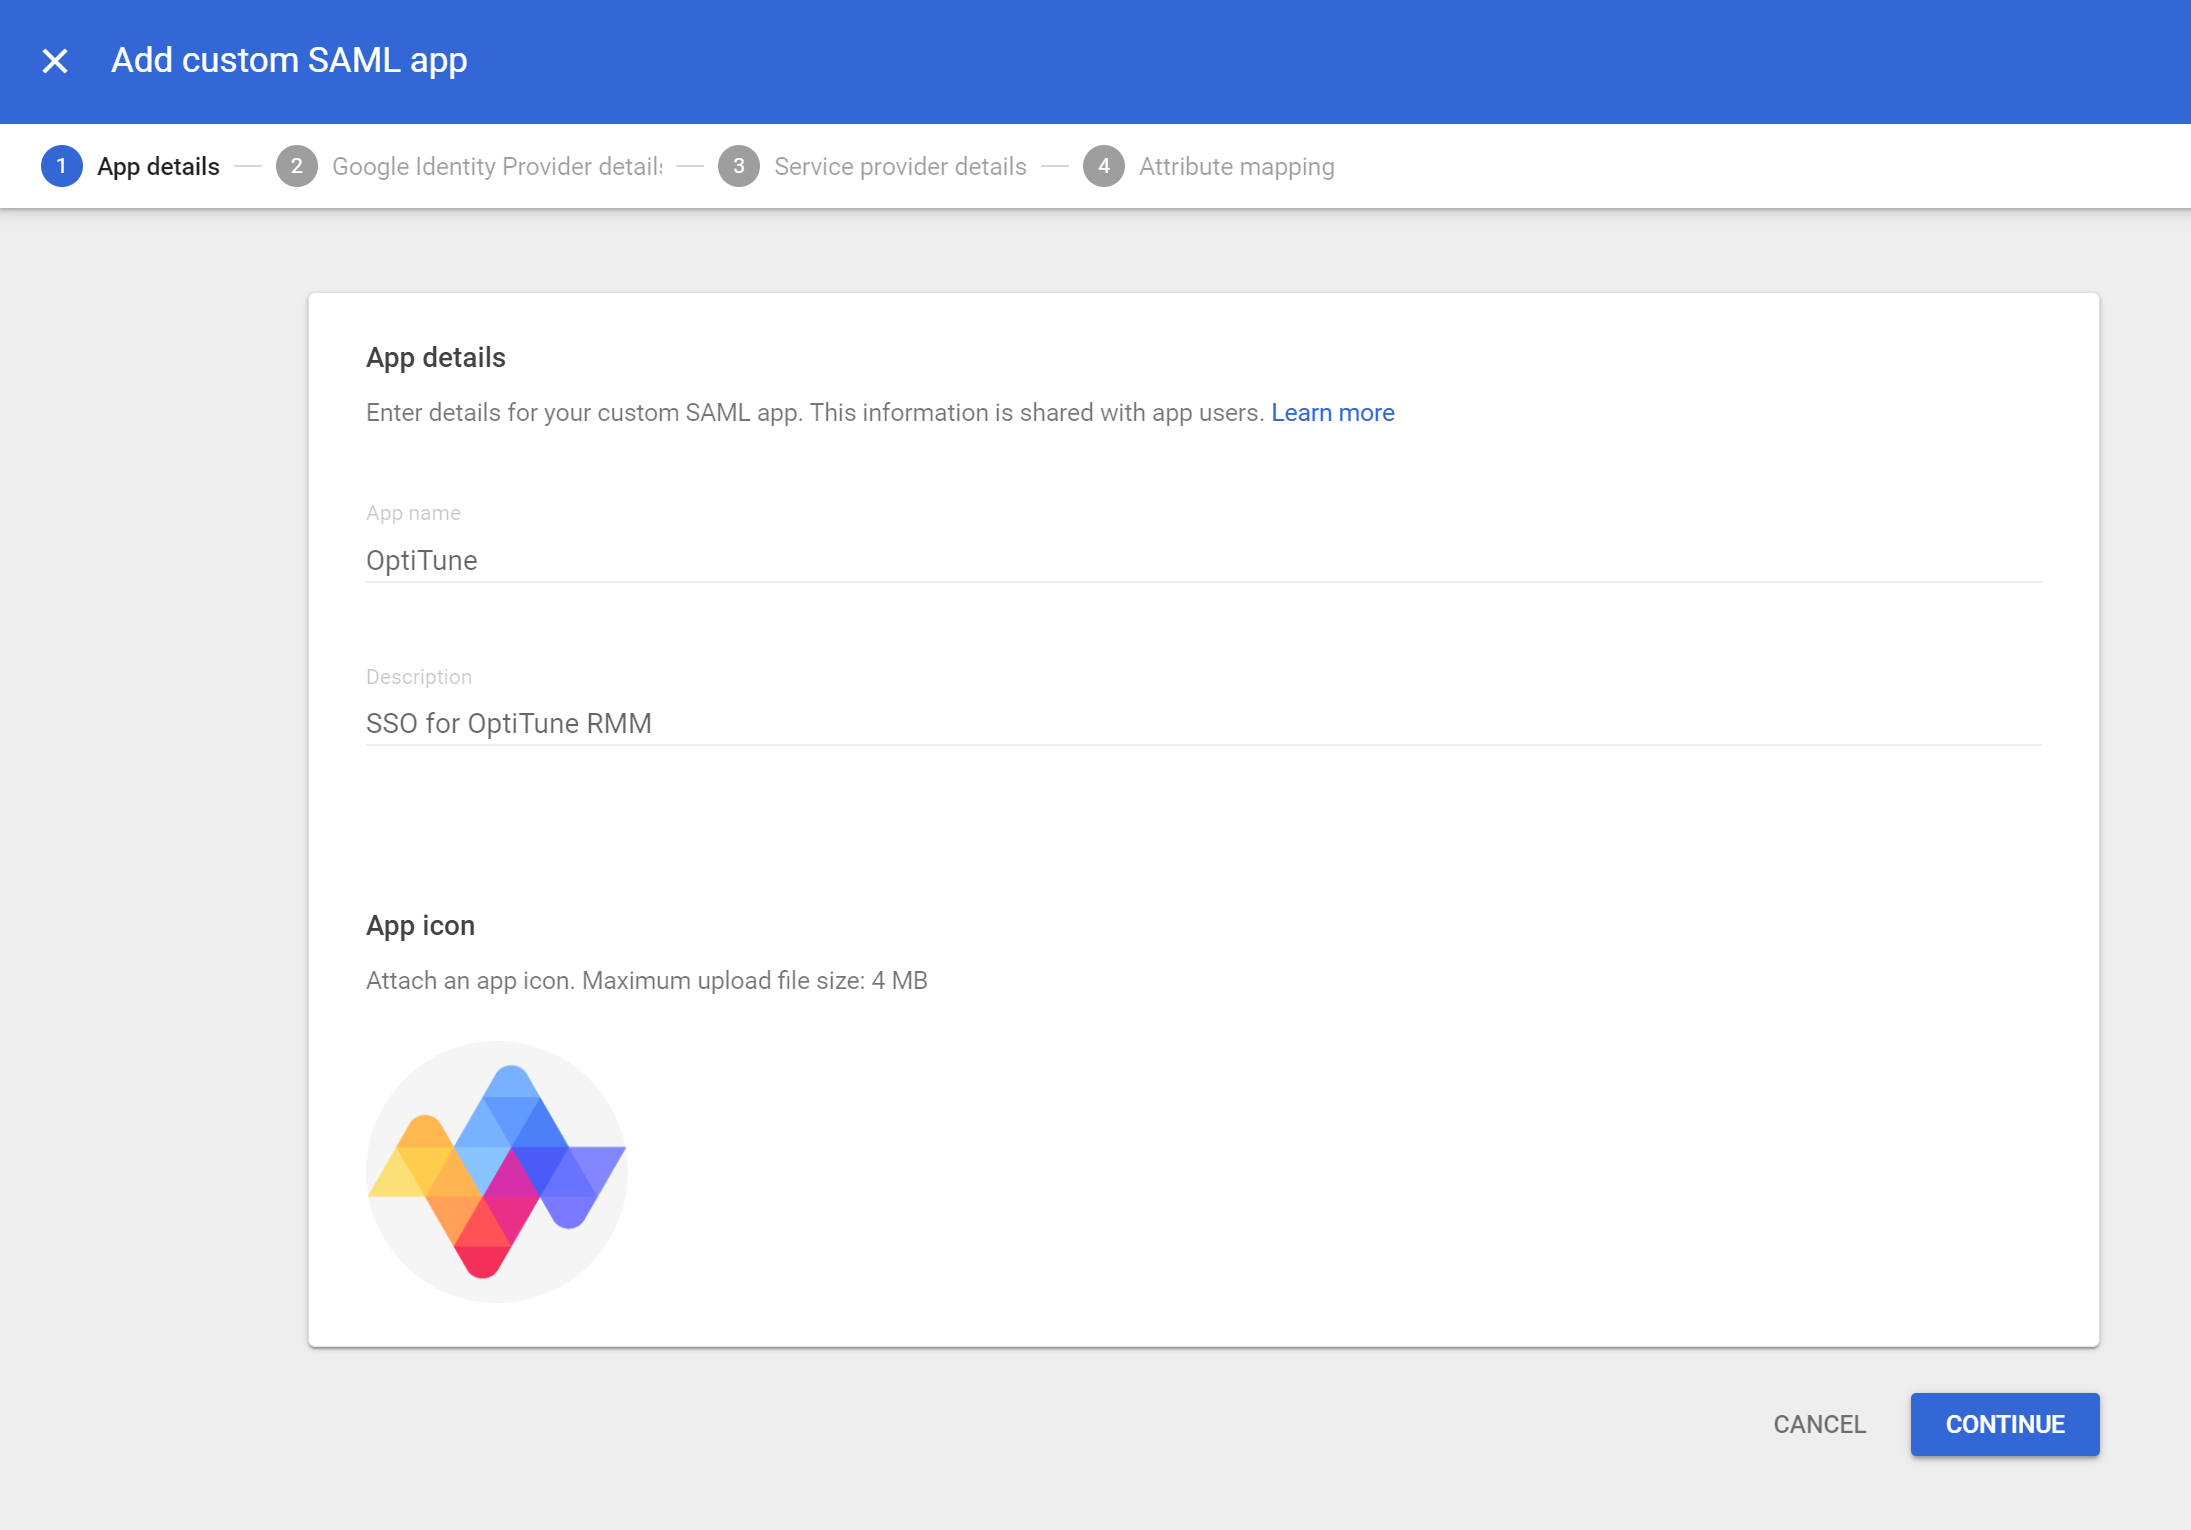
Enter a name and description for the OptiTune application. You can also specify a custom app icon if you like, and it is available here: https://manage.opti-tune.com/style/images/siteicon/logo-256.png
Click "Continue"
Copy SAML Fields from Google to OptiTune
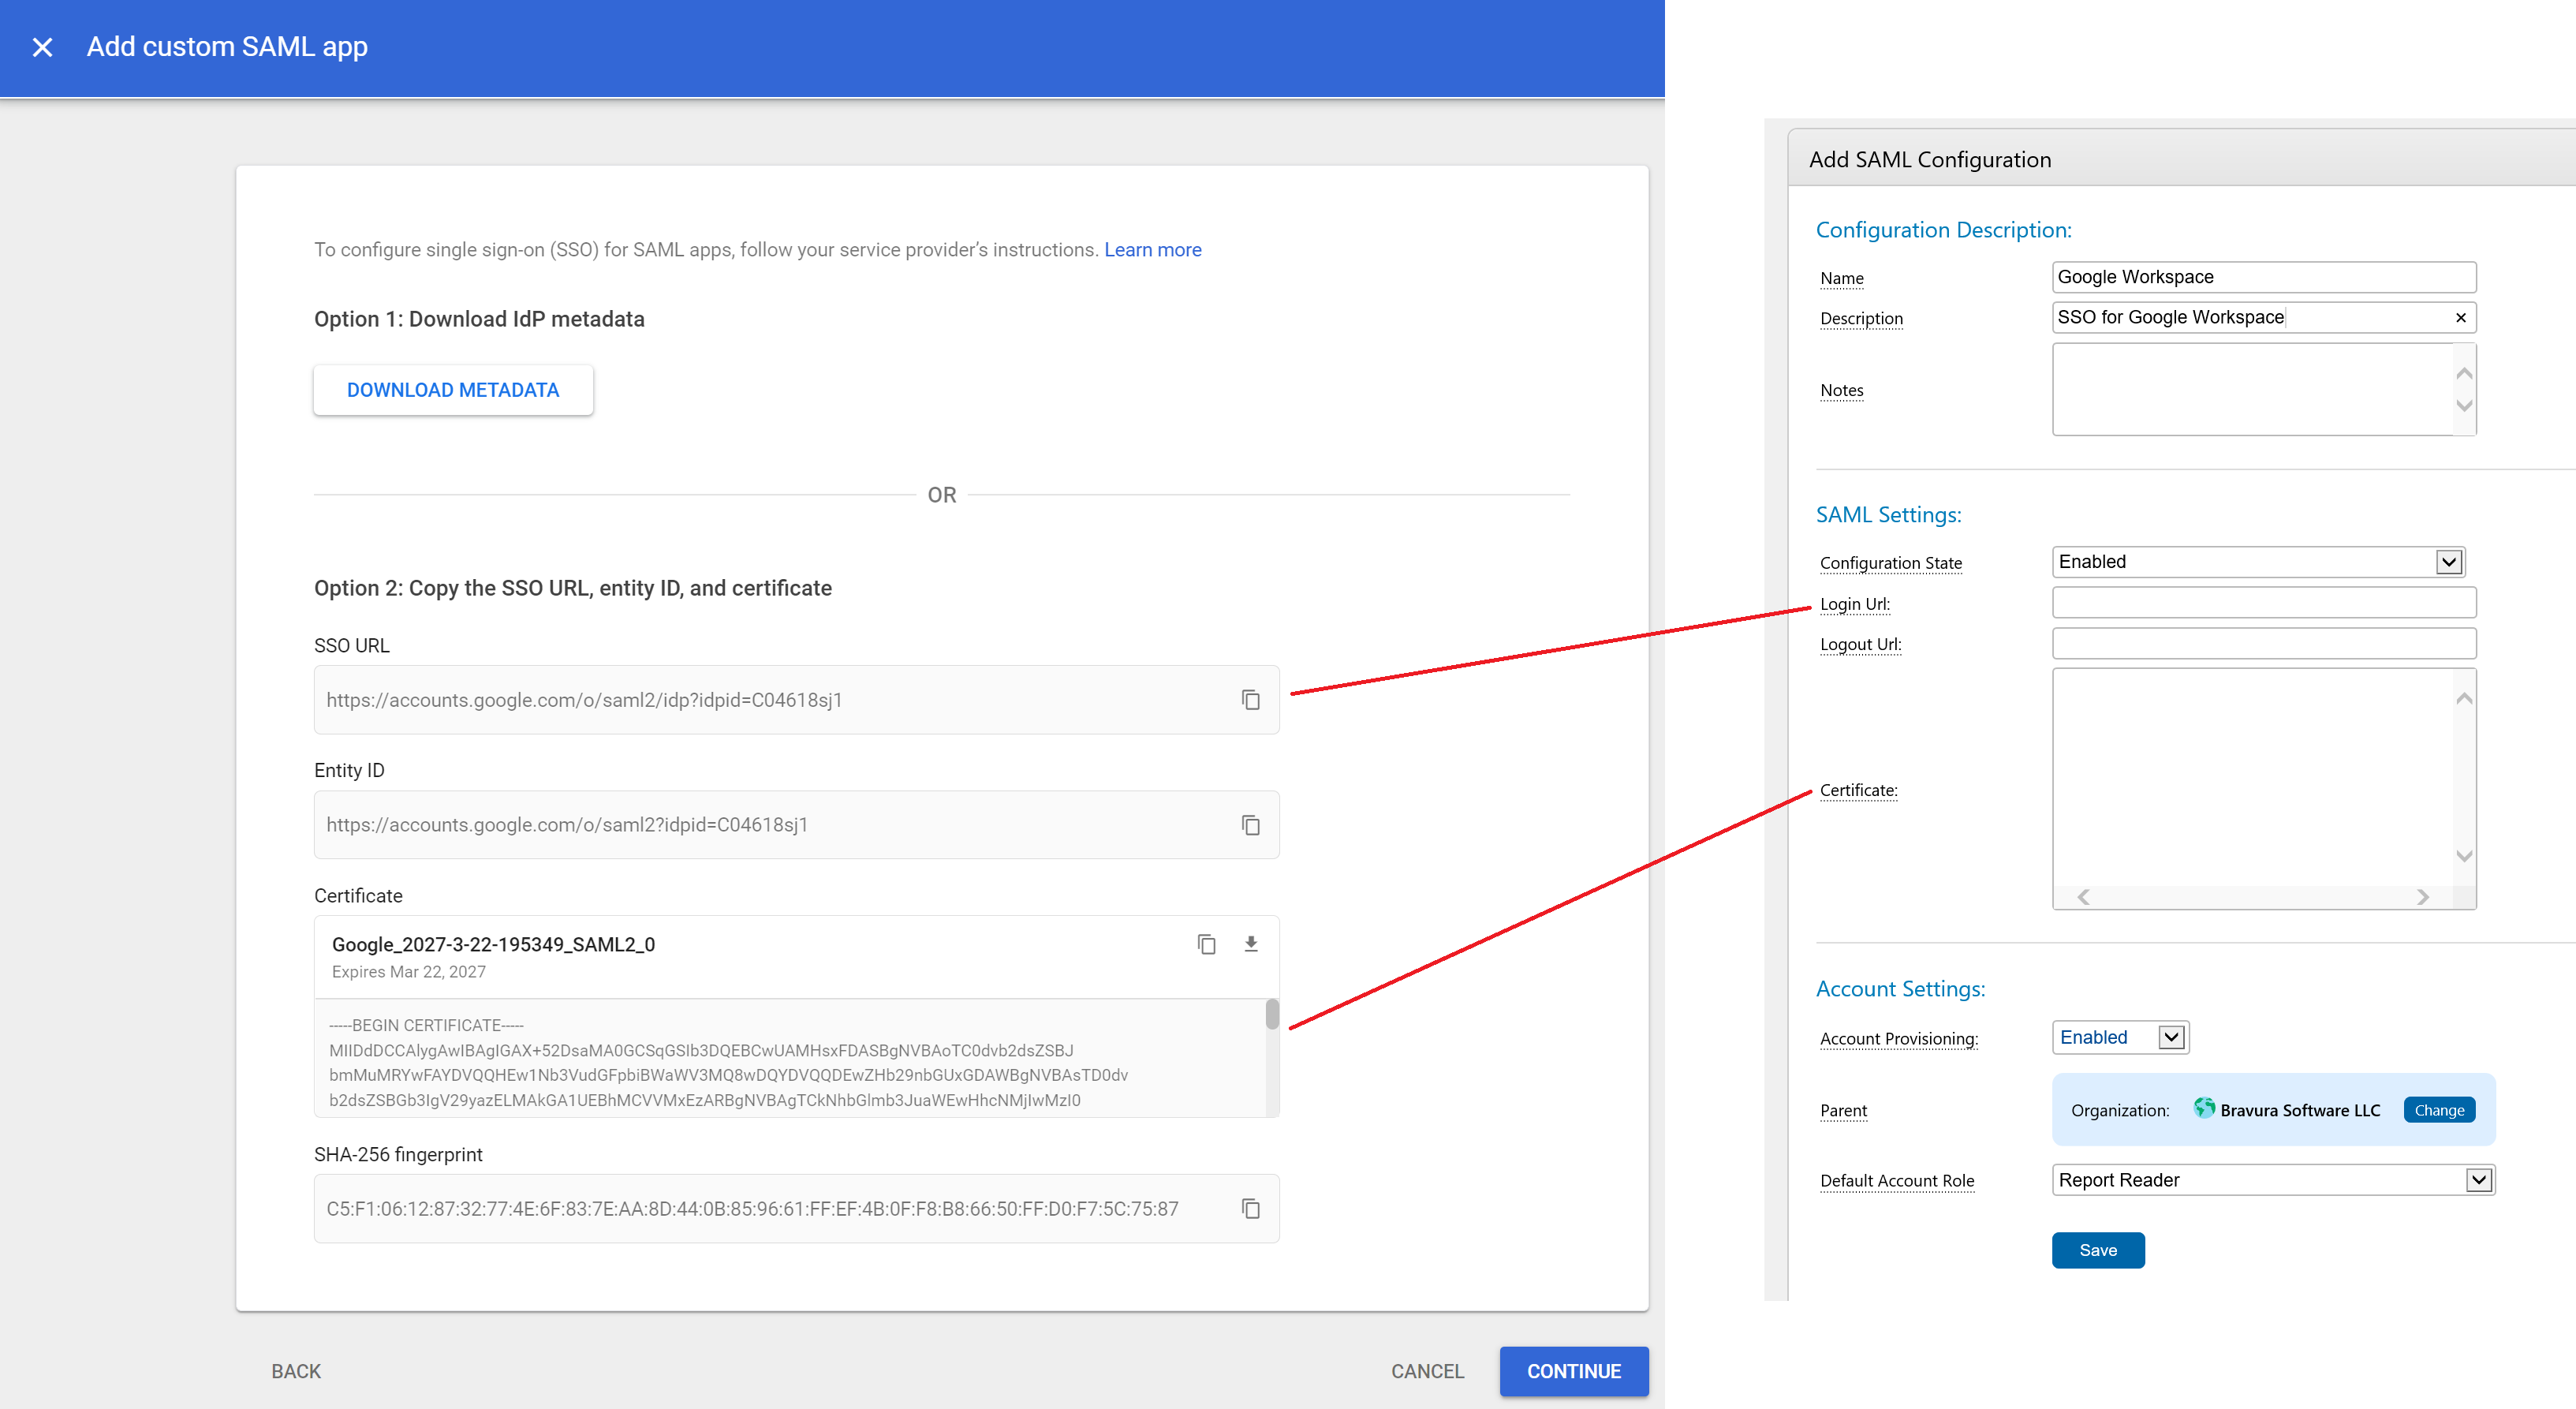
Copy the SSO URL and Certificate text fields from Google Workspace to the corresponding fields in OptiTune, as shown below.
Click "Continue" in Google Workspace
Copy SAML Fields from OptiTune to Google
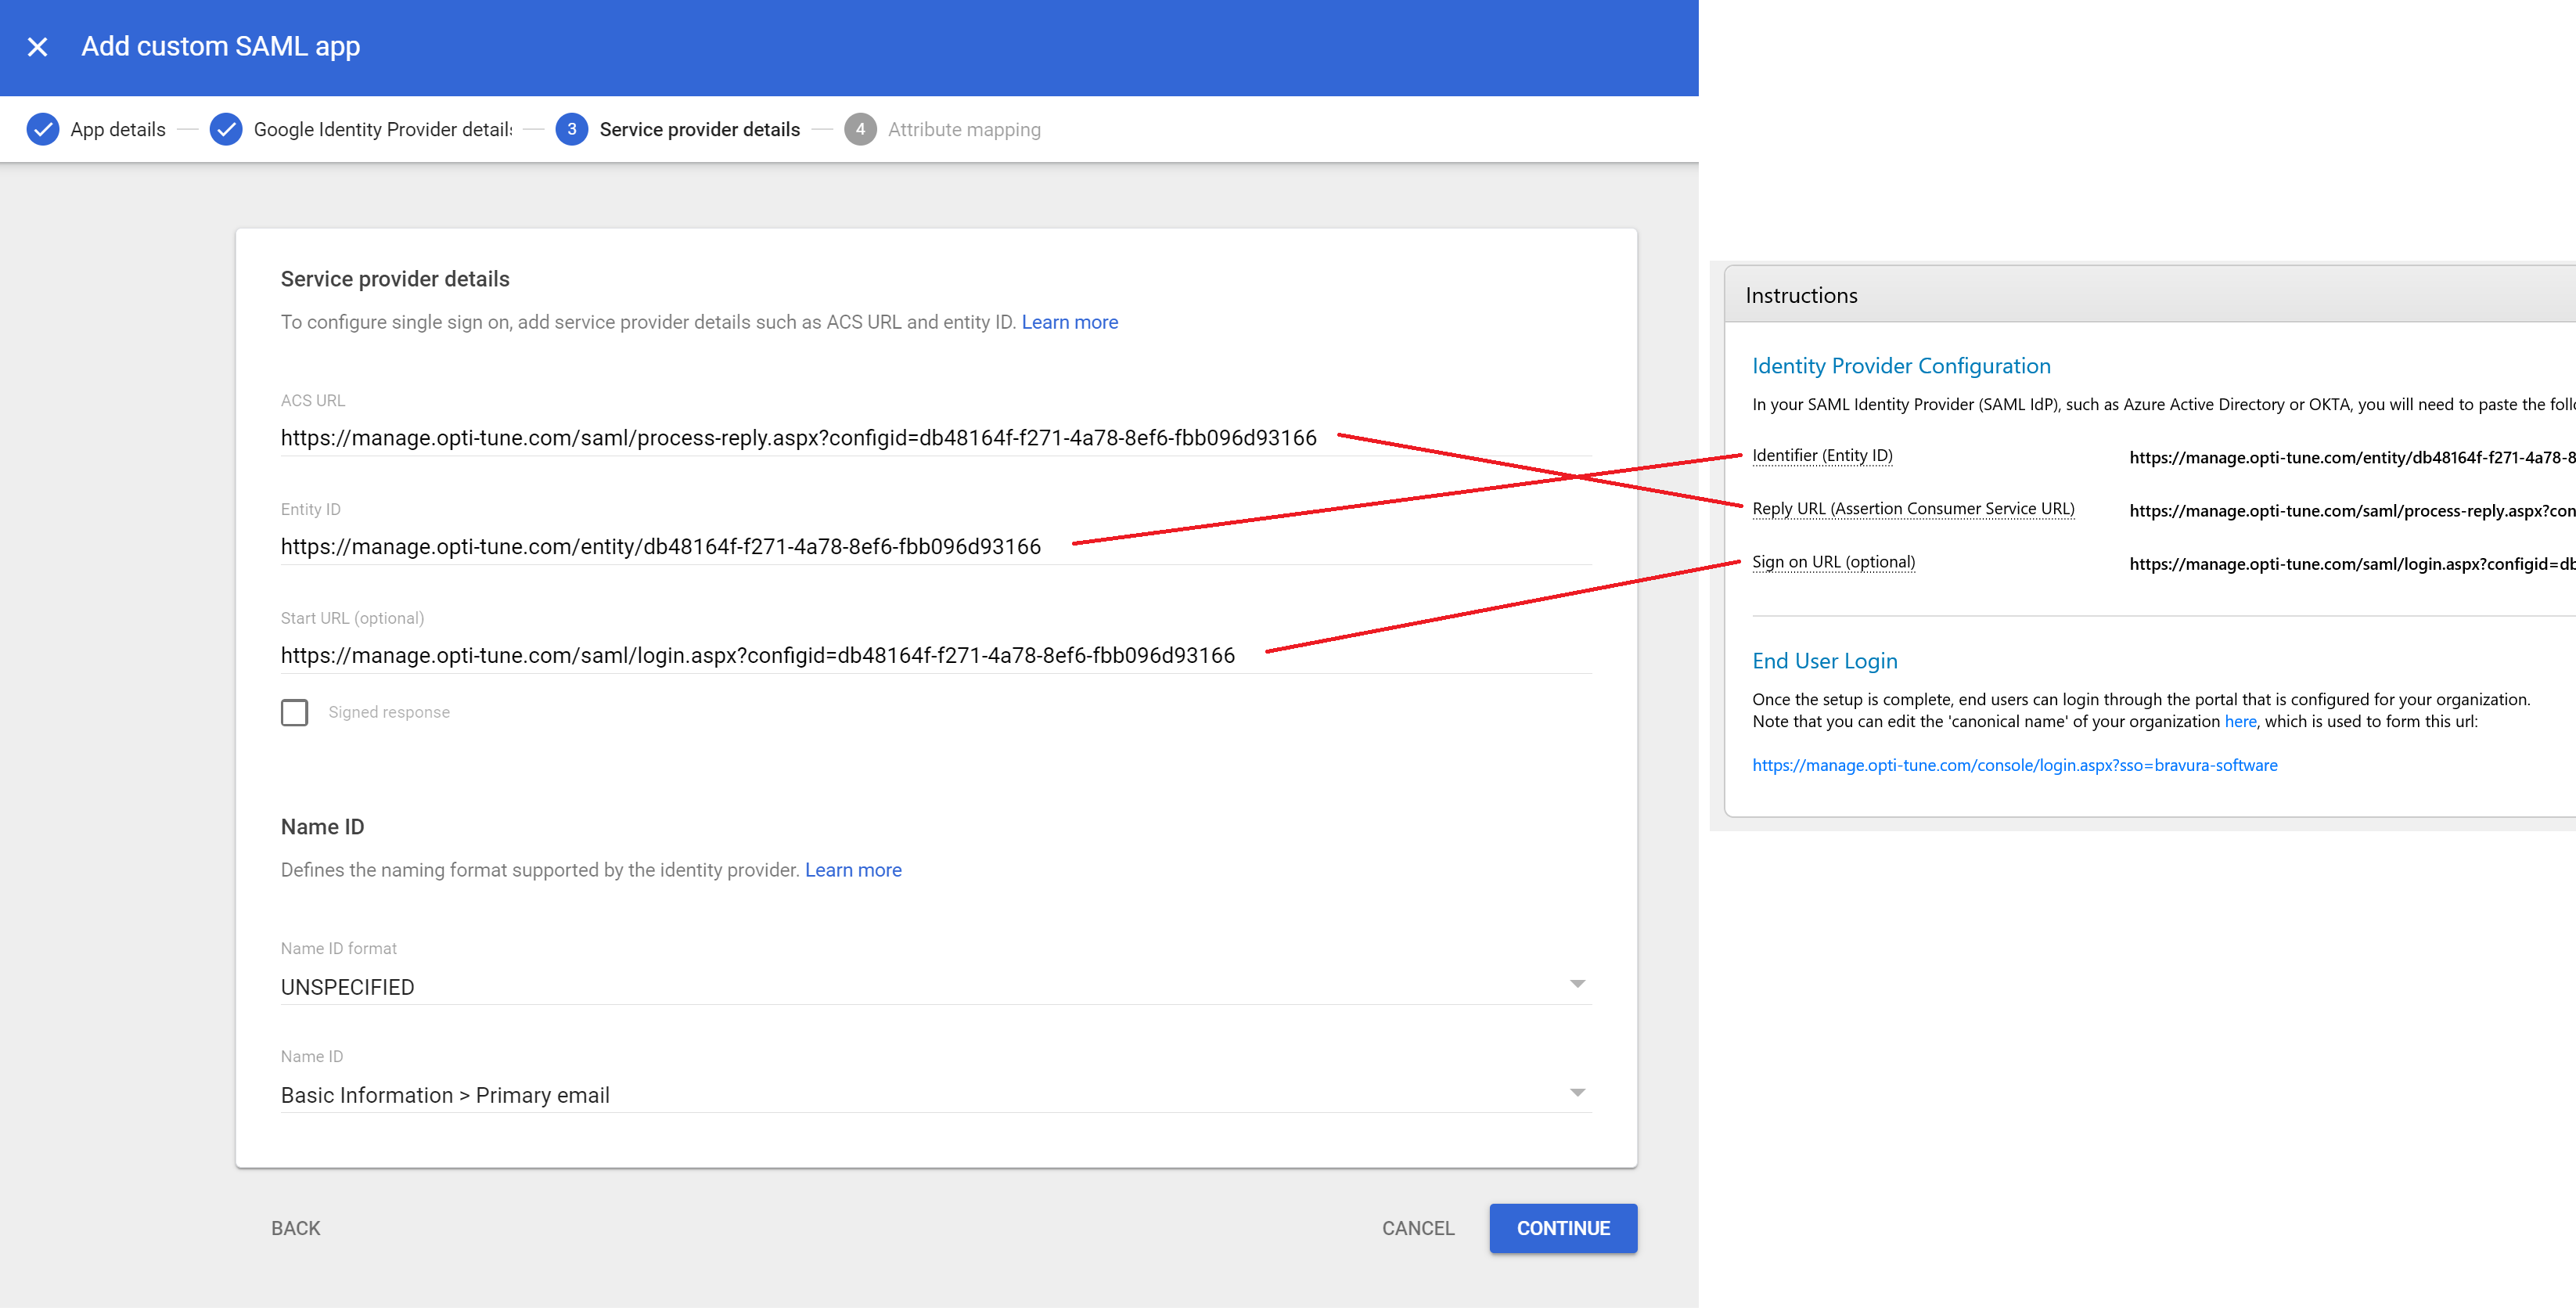
Copy the Identifier, Reply URL, and Sign On URL fields from OptiTune to Google Workspace, as shown below.
Click "Continue" in Google Workspace
Enter Field Mappings
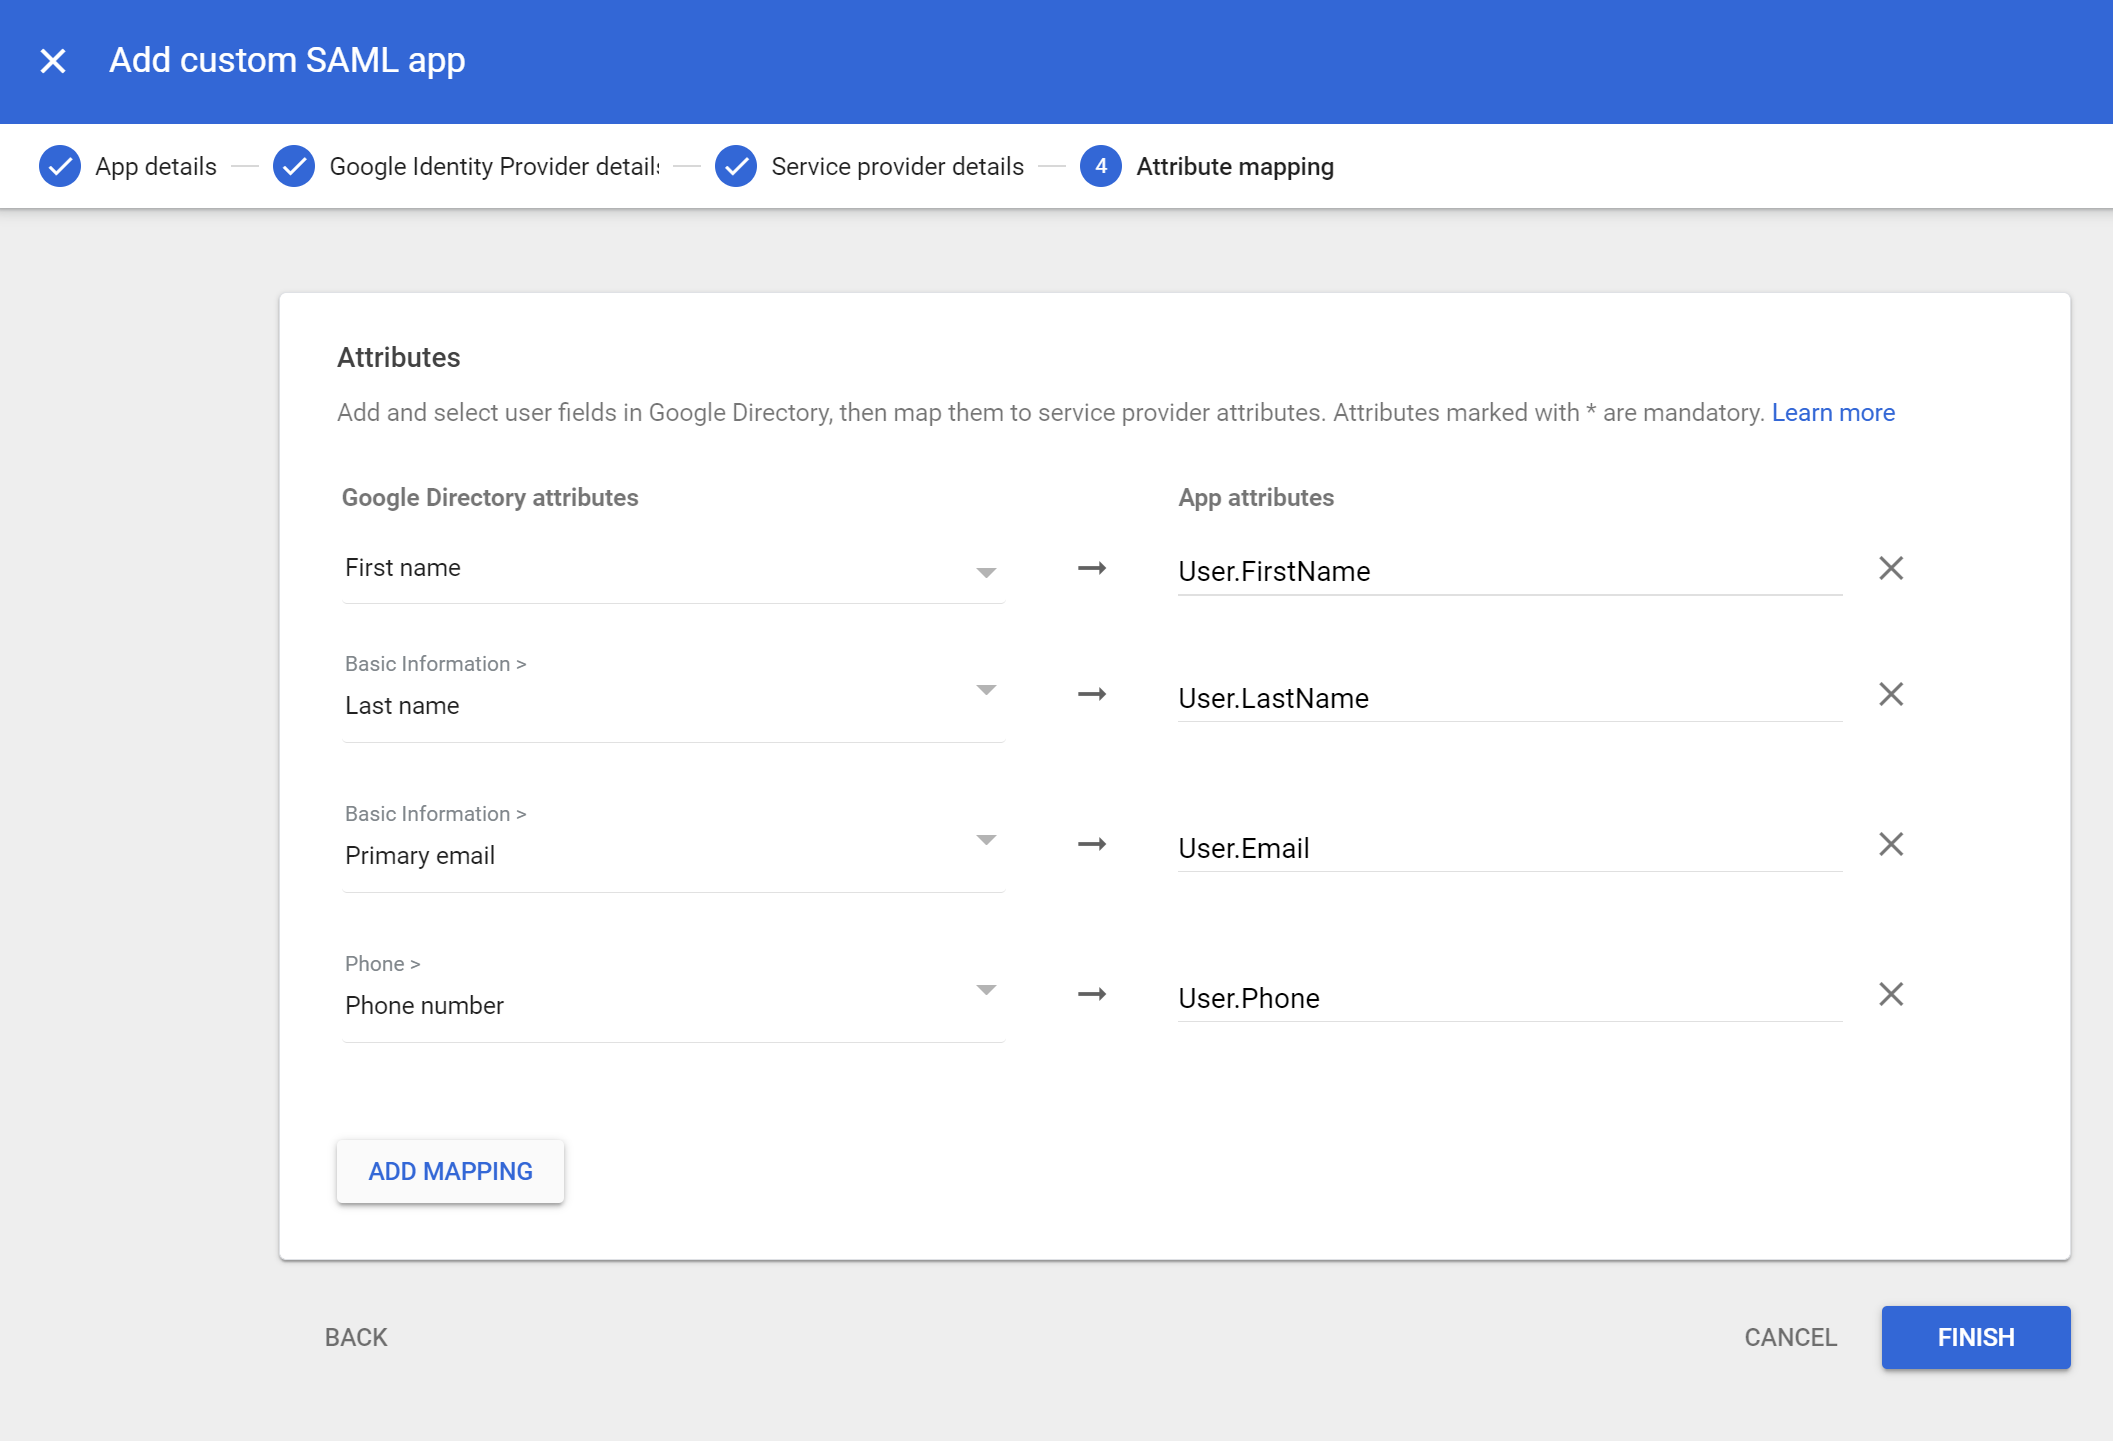
Enter the following field mappings, so that Google Workspace provides OptiTune with the correct logon fields. Note that the field names are case sensitive.
| Google Workspace Field Name | OptiTune Field Name |
|---|---|
| Basic Information > First Name | User.FirstName |
| Basic Information > Last Name | User.LastName |
| Basic Information > Primary Email | User.Email |
| Phone > Phone Number | User.Phone |
Click "Finish" in Google Workspace
Enable User access to the app
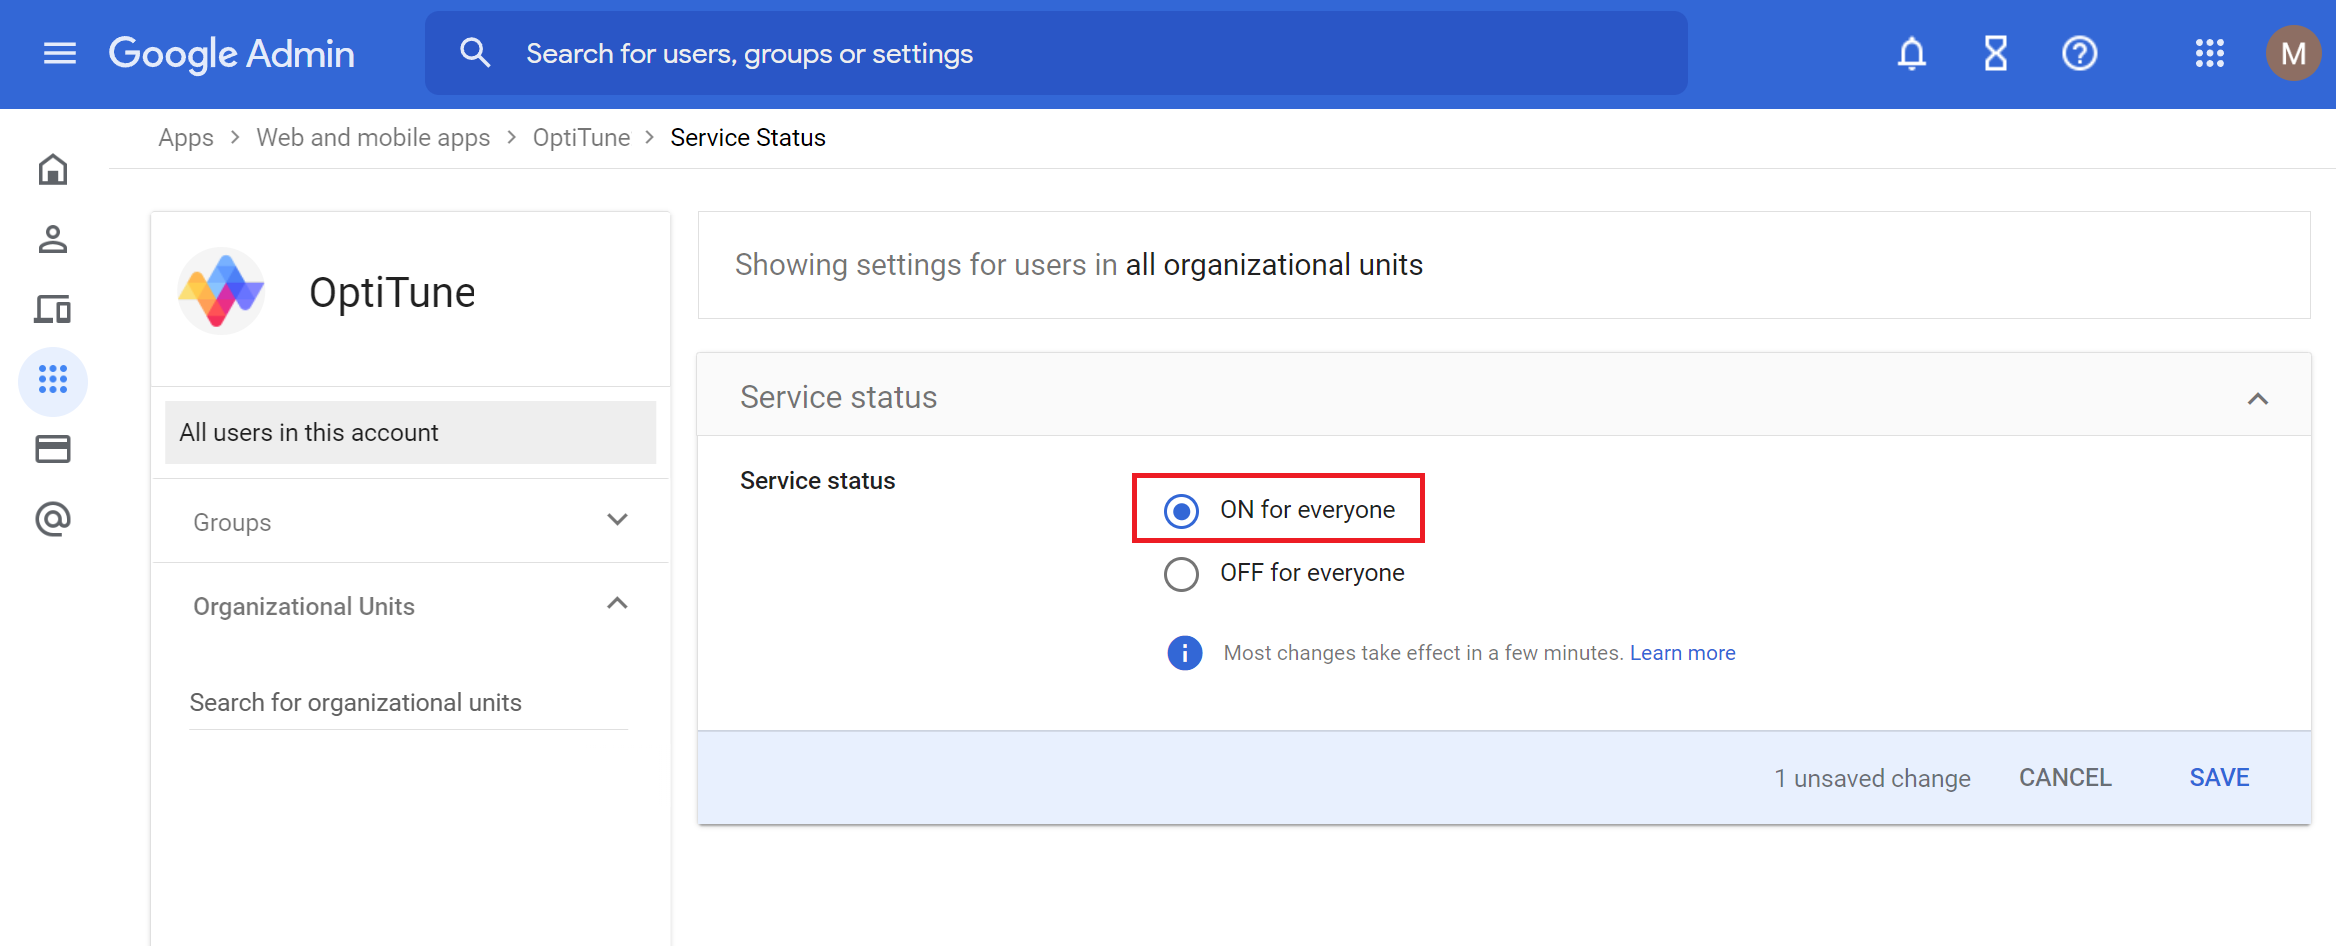
After saving the new app in Google Workspace, you will need to select which users in Google Workspace are allowed to use the app. To allow everyone in Google Workspace to use OptiTune, you will need to click the down arrow under "User Access"
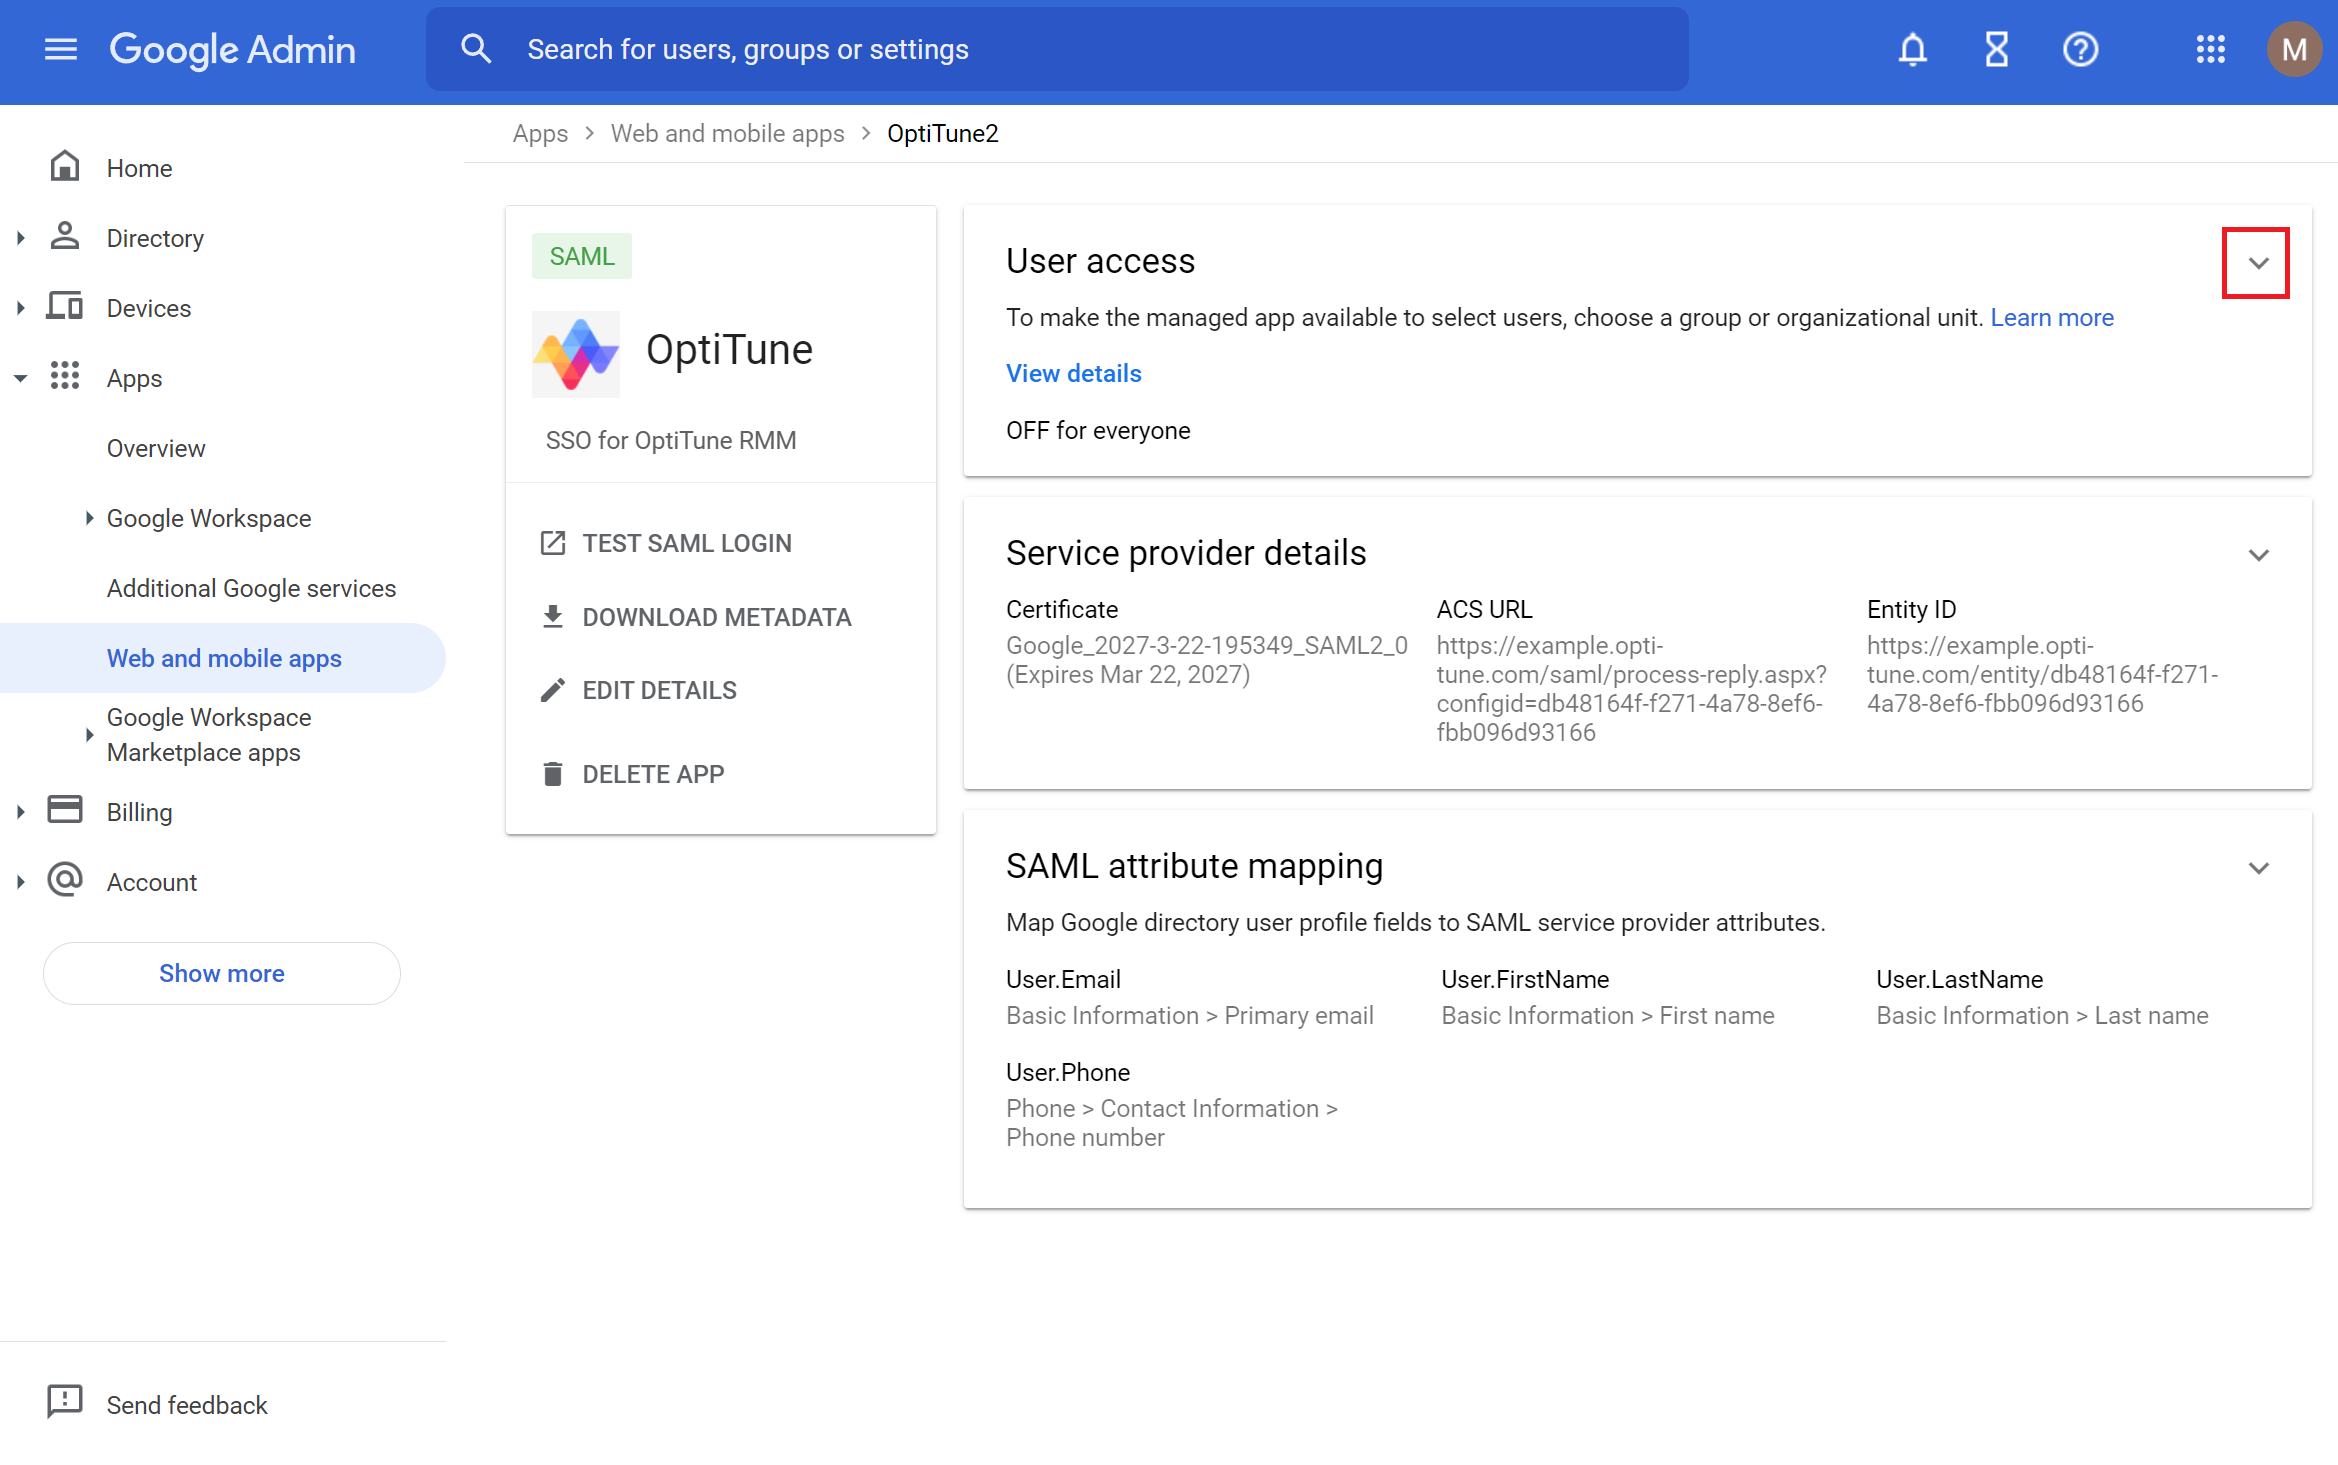
Then, select "ON for everyone" and click "Save"
Save the SAML configuration in OptiTune
Back in OptiTune, make sure you click "Save" to save the SAML configuration you have setup.
Test that the SSO integration is working by using your organization specific Single Sign On (SSO) link shown in the SAML Configurations page.
Or, you can visit the "Sign On Url" link that is shown at the top of the OptiTune SAML Configuration page, under "Identity Provider Configuration".